


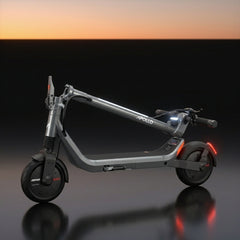


Electric Scooter Inspection
It's the season for getting out and riding electric scooters, but before you do, you'll want to make sure your vehicle is safe and ready to ride.
Rather than risk flat tires or electrical failures, it's best to spend some extra time inspecting your scooter and performing some basic maintenance before you get out on the road.
But what should you look for, besides obvious signs like broken parts or flat tires?
In this article, we'll go through the various parts of an electric scooter and talk about how you can make sure they're up to speed, so to speak, for spring and summer riding.
You'll want to make sure you have a few tools on hand. You won't need special equipment. A standard bicycle pump, screwdriver, some silicone lubricant, and set of allen wrenches should be sufficient for the task.
If you do need to patch or change an inner tube on a flat tire, you'll also need a patch kit or spare tube and tire levers, which you should keep with you at all times.
Doing It Yourself
You might be used to bringing bikes to the repair shop for a tune-up before the season starts. But most bike shops won’t work on electric scooters. If you live next to a scooter service center, it makes sense to bring your vehicle in and have mechanics show you the basics.
But you can learn to tune up your electric scooter at home (and your bikes). A tune up is just a systematic approach to addressing wear and tear before it leads to accidents or breakdowns.
Think of tune-ups as preventative care for your scooter, a way to keep it on the road and out of the shop.
Keep Your Scooter Clean
So much wear and tear and costly repairs can be avoided by cleaning dirt and grime out of sensitive parts before they cause corrosion.
You want to ride a clean machine, so use these tips to keep your scooter free of harmful debris.
Check Your Tire Pressure / Inspect Your Tires
As tire sales people like to say, tires are the most important part of your vehicle. In a big way, they're not wrong.
You're not going anywhere with a flat tire. You want to make sure to avoid the problem long before you get miles from home.
Tire maintenance, then, involves more than just checking your tire pressure, although that may be the most important thing you do.

To check your pressure, you'll need a tire pressure gauge. Ideally, you'll have a pump with a reliable tire pressure gauge built right in, measuring the pressure in PSI (pounds per square inch).
Some pneumatic (air filled) tires will have bent valves to save space. Be aware that you won't be able to fill these without an adapter.
If you have tubeless tires, you can try them at low pressure for more comfort. If your tires have inner tubes, you'll want to run them closer to the recommended tire pressure to avoid pinch flats.
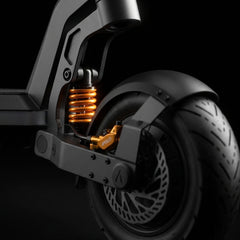
Lubricate Mechanical Parts to Keep Them Moving Smoothly
Use silicone or lithium lubricant. Do NOT use WD-40 on electric scooter parts.
Lube front and rear suspension parts, the folding mechanism, and other parts of the scooter that may have gone a bit creaky over time.
Do NOT, however, get lubricant on brake parts or spray near brake pads, and do not spray lubricant into electrical parts like the motor or any cooling fans.

Check for Loose Wires and Connectors. Check All Lights and Switches
Wherever you see wiring on the scooter, make sure all of the connections are tight and that none of the wiring is stripped.
Make sure that wire connectors are tightly fastened and no bare wire is exposed on the electric scooter.
A clear electrical grade silicone sealant can be used to cover any bare wires you might find.
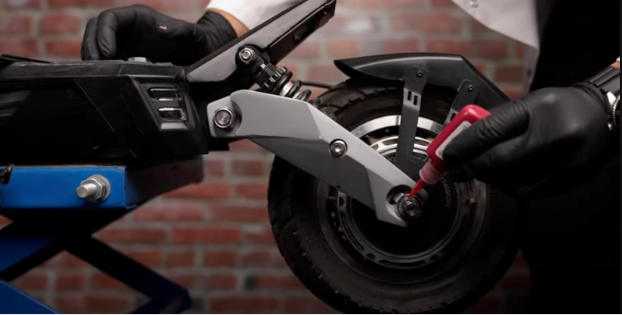
Look for Loose Screws, but DO NOT Overtighten
Pro tip: A little blue Loctite (very little) on important screws and fasteners helps keep them in place.
Check screws on brake levers and handlebar and stem parts, then suspension parts and axles, brake calipers and folding parts.
Start with a general inspection, checking each individual part of the scooter for loose screws. Whether tightening philips head, flat head or hex head screws, make sure to never overtighten!
Overtightening can exceed the tolerances of the scooter's materials and lead to broken parts, stripped screws, and damaged electrical components.

Perform Routine Brake Maintenance
You only really need to perform maintenance on mechanical or hydraulic disc brakes.
Regenerative brakes are maintenance-free and mechanical drum brakes are usually sealed and do not require adjustment or cleaning. This combination makes scooters like the Apollo Pro nearly maintenance-free vehicles.
Disc brakes, however, need regular care because they are exposed to the elements. While many riders love disc brakes for their performance, regular cleaning and adjustment comes with owning an electric scooter that has them.
Cleaning Brakes
First, you should wipe down brake rotors with alcohol wipes or a small amount of isopropyl rubbing alcohol on a clean, damp towel once a week.
Allow rotors to air-dry completely before engaging the brakes.
Cleaning rotors removes grime and debris that degrades brake pads.
You can wipe brake pads with a clean, damp cloth but do not use solvent, alcohol, or cleaner on the pads.
Adjusting Disc Brakes
Hydraulic disc brake calipers are usually self-adjusting, but mechanical calipers have to be set up by hand. This often involves turning a barrel adjuster clockwise/counterclockwise to move the brake pads closer or farther away from the rotor.
You'll typically want your pads close enough to the rotors that they'll bite relatively early during braking, but not so close that your rotors rub against the pads.
Setting up brakes for the first time on an electric scooter can be a bit tricky, so you'll definitely want to watch a video tutorial on this one first.
If brake rub is a serious issue, you may have a bent rotor. This is another problem you can easily fix yourself with tools around the house.
Place your electric scooter on a table or workbench and spin the wheel with the bent rotor. (If you observe the wheel from behind, you should be able to see the part of the rotor that's bent as it slows down. Be patient, this can take some time and careful observation.)
Once you've found the bent spot, mark it with a magic marker. You can use a pair of pliers to gently bend that part of the rotor in the direction it needs to go. Work slowly so you don't bend it the other direction! Check your work often.
You’ll find several videos on brake maintenance and repair and other DIY preventative care tips on Apollo's YouTube channel.
Conclusion
Getting your electric scooter ready for the season by keeping it clean, inspecting structural parts and wiring, filling tires, and adjusting brakes can save you tons of trouble down the road.
While it’s a good idea to have your scooter serviced by a professional every few hundred miles if you can, you can do most routine maintenance and small repairs yourself.
Keep checking back in with Apollo on YouTube for more how-to videos to guide your scooter maintenance journey.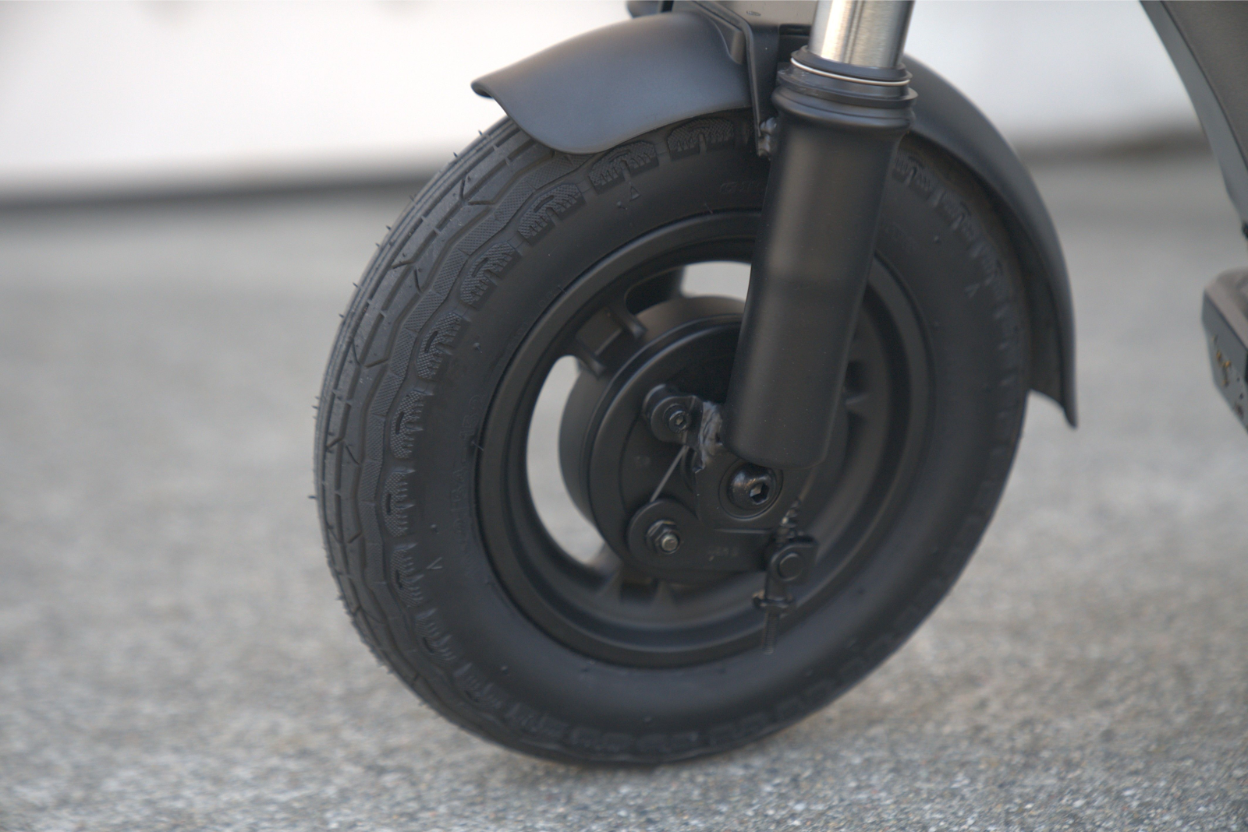
